|
<< Click to Display Table of Contents >> How To Modify the Code Size? |
  
|
|
<< Click to Display Table of Contents >> How To Modify the Code Size? |
  
|
How Can the eTPU Code Size be Increased?
Note; the underlying eTPU address space supports 32K, but NXP populates the various microcontrollers with the size of memory that they feel is required for each specific intended application. The default on the eTPU Simulator was initially 12K in the 55xx family, but has been increased depending on the microcontroller to anywhere from 16k to 24k and beyond.
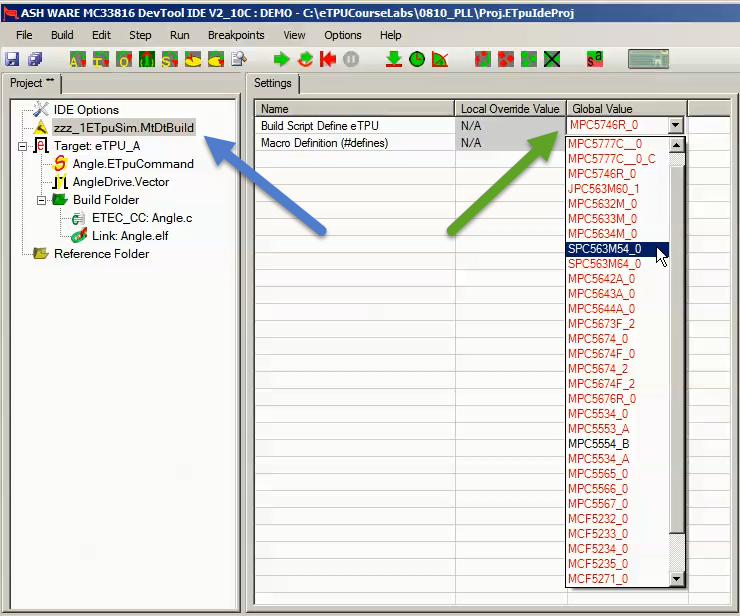
The default code size for all supported microcontrollers is specified by opening the 'Settings' window and selecting the build batch file in the project window. See the blue arrow in the picture below. Then select the desired microcontroller from the list, below.

Various build parameters are specified in the build script. This file is run when the simulator or debugger is initially launched and this file "tells" the simulator how big memory is along with various other parameters.
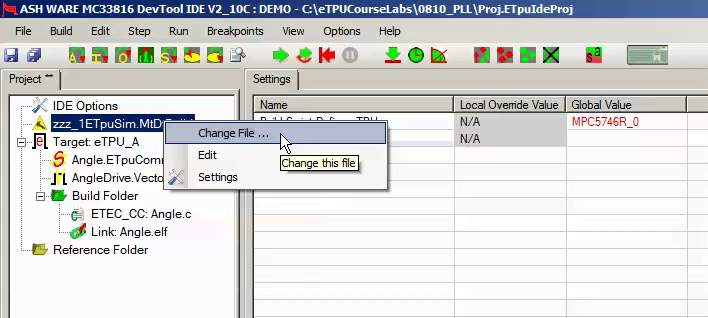
This file can be changed by right-clicking on the build batch file within the project window, as shown below.

Create a copy of the build batch file, and place into a separate directory. Be sure to do the following.
•Copy all files included by the build batch file such as 'zzz_eTpuVersions.Dat'.
•Place the copied files into a separate directory outside the installation area to work in future versions.
•Change the names to remove the zzz_ prefix. Note that the 'zzz_' portion of the name indicated to DevTool that the file is one of the standard included files so the name must be changed to avoid triggering diagnostic errors.
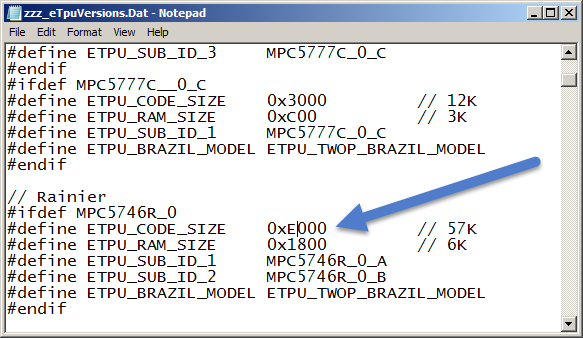
Edit the build batch file to change the memory size. For instance, in the picture below the Rainier MPC5746R_0's code size has been changed to be 57K (0xE000) as indicated by the blue arrow.

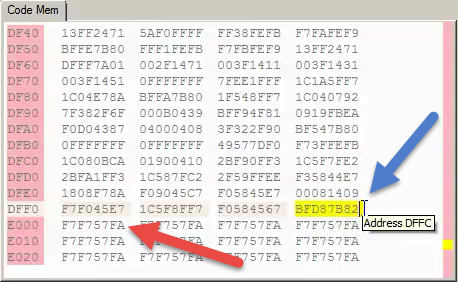
In the picture below, the blue error points to the last valid opcode at address 0xDFFFC. The blue arrow indicates the first opcode slot beyond valid memory. The default (unused) memory has been set to return a 0xF7F757FA.
